Graphical Automation Editor
A collection of 3 prototypes for an automation editor in Max.
Download All
Max and bitKlavier Playthrough
GraphicalAutomationEditor
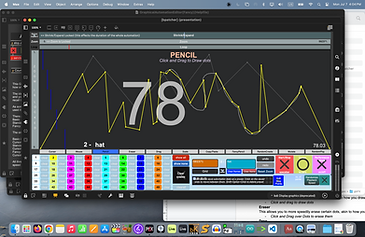
These Graphical Automation Editors (GAE) are prototypes/demos created entirely using Max objects. The aim is to allow for a timeline based composition process using automation channels in Max. This is intended specifically for live performances of electronic and electro acoustic music. It is more akin to how one might work in a Digital Audio Workstation. Try going into presentation mode to see how it looks!
The idea is based around setting the duration of your composition, f.x. 300000ms, and then having multiple automation channels (that are overlaid) that you can add/draw automation dots in. The GAE will interpolate between the dots and you can then ‘send’ it to control anything in your patch! The range is always between 0 and 1, but using the ‘scale’ object you can have it work for any range you need. There are 47 channels you can use simultaneously and the GAE is also preset compatible so you can create multiple compositions and recall them within the same patch.
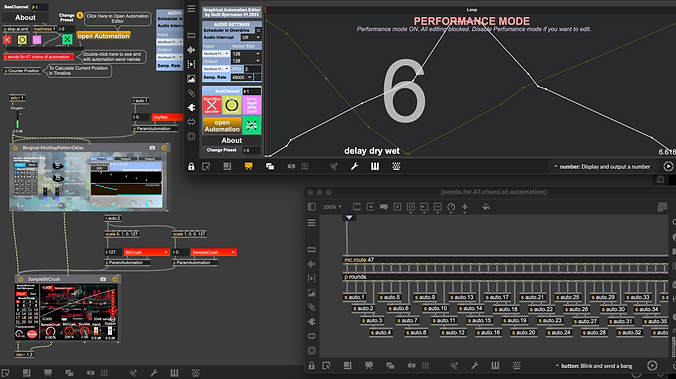
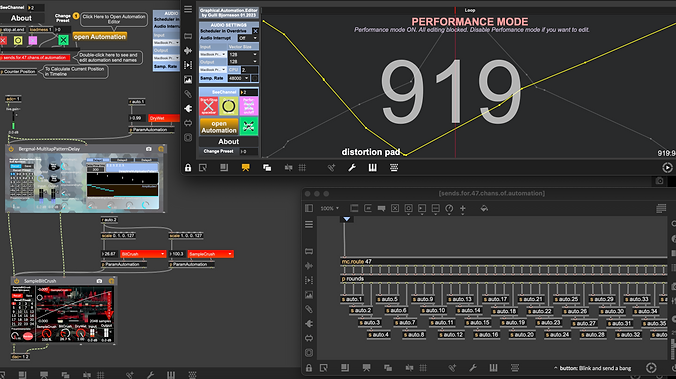
Here is an example of the GAE controlling a simple audio effect chain in Max. There are two automation channels, the first controlling the pad for a distortion effect. Notice how in the the first image the value from ‘Auto.1’ meaning channel 1, is low when the red line on the timeline is at the start and high for ‘Auto.2’. Then in the 2nd image further ito the timeline, the values have switched.
As someone who loves being able to create custom environments and devices for my compositions but also as someone who wants to be able to have a way to control timings in a user friendly way, I have found this GAE extremely useful and have used it for almost all of my electronic music compositions.
There are three prototypes that I made:
1. Basic
.png)
.png)
2. Standard
3. Fancy
.png)
The simplest and most stable GAE is Basic, while the most complex and unstable is Fancy. I would highly recommend starting with Basic, and then once feeling comfortable with it, move on to Standard and Fancy.
Basic includes 5 main modes of operation
-
Cursor, Mouse, Pencil, Eraser, RandomPlay
Standard includes 8 main modes of operation
-
Cursor, Mouse, Pencil, Eraser, Drag, Scale, Copy/Paste, RandomPlay
Fancy includes 11 main modes of operation
-
Cursor, Mouse, Pencil, Eraser, Drag, Scale, Copy/Paste, FancyPencil, RandomCreate, Mutate, RandomPlay
All three have a special PerformanceMode option that blocks all editing functions and sets the GAE to be fixed in Cursor Mode. It is recommended to have PerformanceMode On during live performances. Standard and Fancy also include a function for adding drunk randomization onto the clock speed of the GAE called Randomize Playback Speed.
Following are descriptions of the modes of operation
Performance Mode
Performance mode is a way to block all editing functions when performing live. It fixes the GAE to be in Cursor mode.
-
When Performance mode is ON All editing is blocked.
-
Disable Performance mode if you want to edit.
-
Have it on during live performances

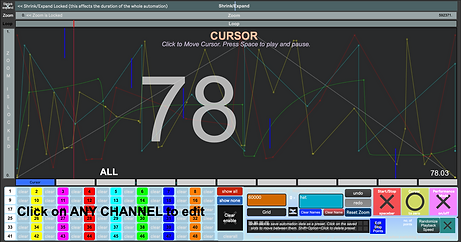
Cursor
Cursor mode allows you to jump through the timeline. Very useful for sound checks and also when working on specific sections.
-
Click to move the cursor throughout your timeline.
-
Press Space to play and pause.
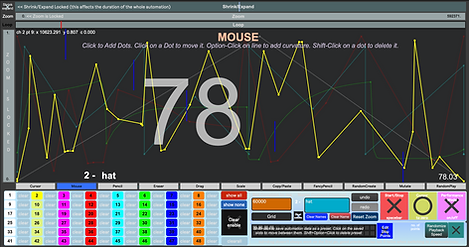
Mouse
This is how you can add automation dots and adjust the slope between them. This is really just how you interact with the awesome function object in Max.
-
Click to Add Dots.
-
Click on a Dot to move it.
-
Option-Click on line to add curvature.
-
Shift-Click on a dot to delete it.
Pencil
This allows you to more speedily draw in dots, akin to how you draw with a pencil. Note that it does not erase any previous data, just adds it in.
-
Click and drag to draw dots
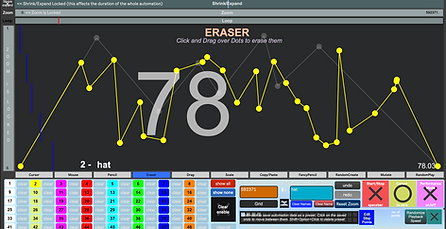
Eraser
This allows you to more speedily erase certain dots, akin to how you use an eraser.
-
Click and Drag over Dots to erase them
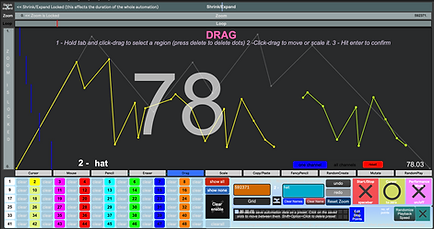
Drag
This allows you to select a region of dots and move only them around. You can also press delete after selecting them to delete your selected dots/region. You can do this on one automation channel or multiple using the OneChannel and AllChannels options.
-
Hold tab and click-drag to select a region (press delete to delete dots)
-
Click-drag to move it
-
Hit enter to confirm
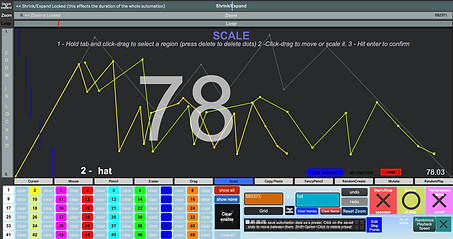
Scale
This allows you to select a region of dots and scale them (shrink or expand the dots while keeping the same shape). You can also press delete after selecting them to delete your selected dots/region. You can do this on one automation channel or multiple using the OneChannel and AllChannels options.
-
Hold tab and click-drag to select a region (press delete to delete dots)
-
Click-drag to scale it
-
Hit enter to confirm
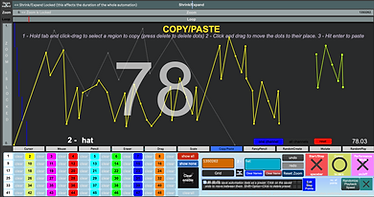
Copy/Paste
This allows you to select a region of dots, and copy-paste them into automation channels. You can also press delete after selecting them to delete your selected dots/region. You can do this on one automation channel or multiple using the OneChannel and AllChannels options.
-
Hold tab and click-drag to select a region to copy (press delete to delete dots)
-
Click and drag to move the dots to their place.
-
Hit enter to paste
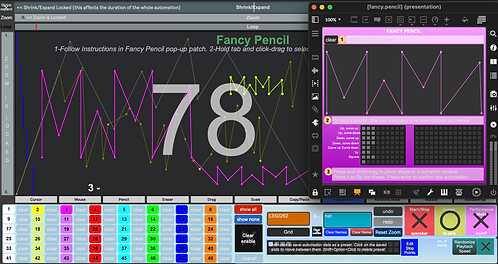
Fancy Pencil Mode
Fancy pencil allows you to create your own intricate shapes and quickly add them into your automation channel. It is preset compatible so you can have lots of customized shapes and quickly recall them.
-
Follow Instructions in Fancy Pencil pop-up patch.
-
Hold tab and click-drag to select area.
-
press X to flip.
-
Hit enter to confirm
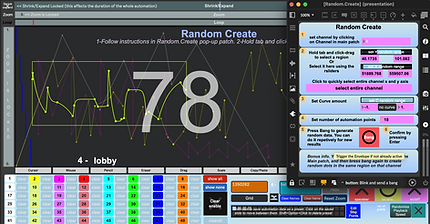
Random Create Mode
Allows you to select a region and generate random automation data within that region. It only works on one channel at the moment.
-
Follow instructions in Random Create pop-up patch.
-
Hold tab and click-drag to select an area
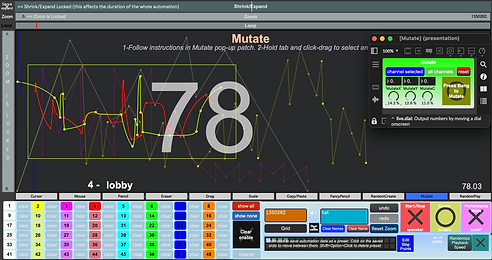
Mutate
This allows you to select a region in your automation channel or channels and create variations/mutations of it. The X axis shifts the dots around their current position horizontally, the Y Axis shifts the dots around their current position Vertically while the C axis randomizes the slope/curvature between the dots. You can do this on one automation channel or multiple using the OneChannel and AllChannels options.
-
Follow instructions in Mutate pop-up patch.
-
Hold tab and click-drag to select an area
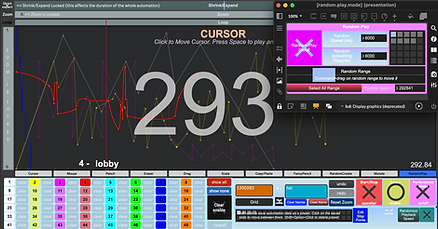
Random Play Mode
Allows the GAE to cycle randomly, forward and backwards with and without interpolation in your timeline.
-
Follow instructions in Random Play Mode pop-up patch.
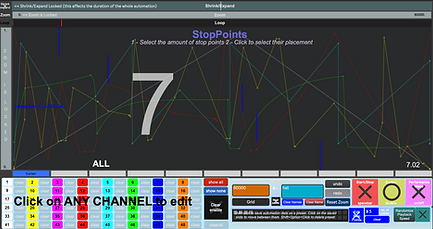
Stop Points
Allows you to add points where the automation will stop playing. This might be of use if someone wanted to have an indeterminate amount of time to improvise in a specific part of the piece. Once it has stopped, you simply hit the spacebar again to restart.
-
Select the amount of stop points
-
Click to select their placement
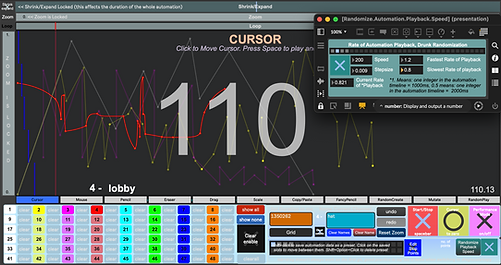
Randomize Playback Speed
Allows you to add a bit of randomness to the clock speed of the GAE. This is done via drunk randomization, and when used will make each performance be slightly different as it will randomly slow down and speed up throughout.
-
Follow instructions in Randomize.Automation.Playback.Speed pop-up patch.